Scaleauto R8 LMS White-kit Review by Giovanni Russello (GRUNZ)
Intro
I am a big fan of GT3 cars –both in real and small scale. There are so many fantastic models and liveries. As a bonus, manufactures release or update their cars almost every year. This keeps things fresh and interesting.
One of my favourite GT3 cars is the 2015 Audi R8 LMS. As soon as it was available, I got one of the first releases made by Carrera in 1:32nd scale. Carrera cars are great, but they are quite heavy and not that competitive against more performant models from other manufactures (unless you get 3D chassis and put the body on a diet). Thus, I was really thrilled when last year Scaleauto announced the arrival of their R8 LMS model.
The model
Scaleauto is renowned for creating high-detailed models and more recently has also upgraded the chassis of all its models, making them more competitive. With their R8 release, there was a further change in the design of the chassis, adding an in-flex technology similar to the Black Arrow GT3 Italia. This was another reason I wanted to get one and test it.

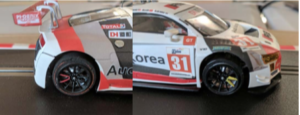
For this review, I will be focusing on the white-kit release. Back in December, I ordered decals from MTR32.com for the livery of the #31 Phoenix Racing car running in the Asian Le Mans Series.
The model comes in the typical package Scaleauto uses for its white-kits: a large paper box with the main body separated from the other pieces and the chassis.
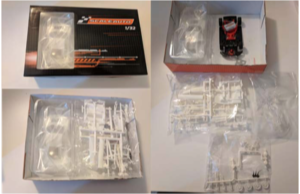
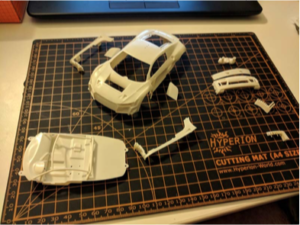
The car’s body consists of several well-detailed parts. There are some optional parts for assembling the rear of the car with different exhaust systems. The interior is a flat pan with some basic decoration (more on this later).
The assembly is pretty straightforward, and all the parts come together with no major issue. I painted the body white, using Tamiya TS paint sprayed through my airbrush.
After detailing some of the parts with semi-gloss black, I applied the decals. To seal the decals, I finished the model off with Tamiya X22 clear cote (again sprayed through my airbrush). The decal job is not the neatest: I overused the Micro Sol liquid, making the decals too soft and wrinkly.
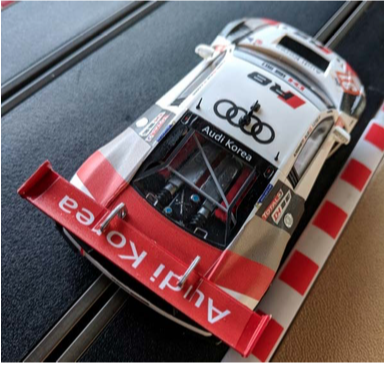
The kit comes with two wings and two sets of wing uprights. For taking these pictures, I decided to use the most detailed and fragile option. In the picture below, you can see also the engine bay that I had to scratch build because the kit comes with no detail at all (more on this in the next section).

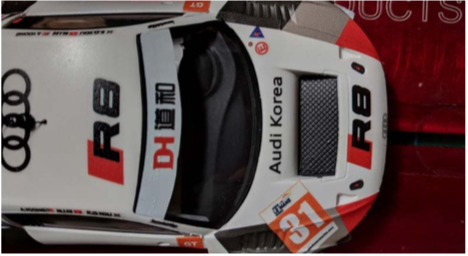
The other parts that need attention are the big air intake on top of the bonnet and the air intakes on each side. The kit does not include any parts for closing these “holes”. So I had to scratch built the big front vent, using thin styrene. To make the grill, I used the material from a tablet container painted flat black.

For the side air intakes, I used the same material cutting it into shape. Only this time, I did not painted the grills and glued them directly inside the vents. Overall, I am quite pleased with the way the grill covers look.
There are still more components that need attention. In particular, the kit comes only with the BBS inserts of the Scaleauto Porsche 991 GT3. These are completely wrong for this car.
To overcome this issue, I used the inserts from one of my Sideways Huracan kits: the inserts are not exactly the right ones, but they look much closer to what Audi is using on the R8.
After painting the inserts flat black, I detailed them by painting two spokes cadmium yellow for the front wheels and bright red for the rear ones.
Interior
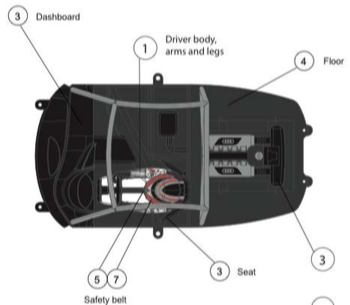
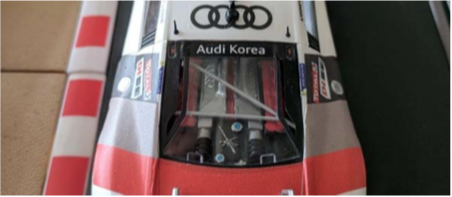
The interior in the kit is very simple…too simple for my taste. The R8 has a huge rear window through which the engine is clearly visible. However, the interior tray of the kit is completely void of any details. A real pity. I contacted Scaleauto about this, and they ensured me that the decorated version of this model will have some details in the engine bay. For reference, here you can find the drawings that Scaleauto sent to me.
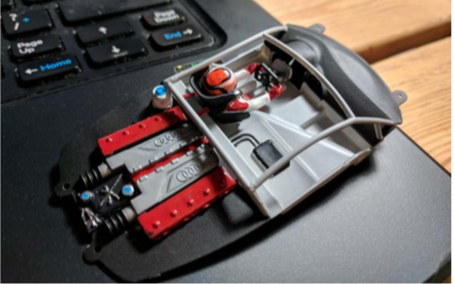
Now, as I said I own several Carrera R8 LMS and also the NSR R8 (old model). Both of them have some nice details when it comes to the engine bay. Therefore, taking some inspiration from the Carrera model, I used the pieces from the NSR R8 interior to recreate the engine details of the new R8.
As for the driver, I painted the half-figure that came with the kit and added the helmet from the Carrera driver. The Scaleauto kit comes with a decent steering wheel and seat so not need to add much there. I also added the missing rollcage in the engine bay: below you can see the overall outcome. Not bad I must say!
Chassis
As mentioned before, the chassis’ central section (the part around the motor pod) is separated from the rest of the chassis. This gives the chassis some extra flexibility. It should be possible to regulate the flexibility using plastic stoppers screwed in specific points in the chassis. However, the white-kit does not come with any of these components.
I set the chassis according to the DiSCA GT3 Euro Series specs. For this series, we use an anglewinger motor pod with the Scaleauto Baby Sprinter motor and Scaleauto sponge rear tyres.
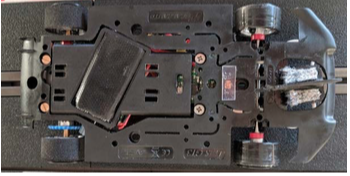
From the picture, you can also see that there are 2 extra front axle holders. These can be used for semi-axles to have independent front wheels. Using grubscrews, one can adjust the camber similarly to Thunderslot chassis.
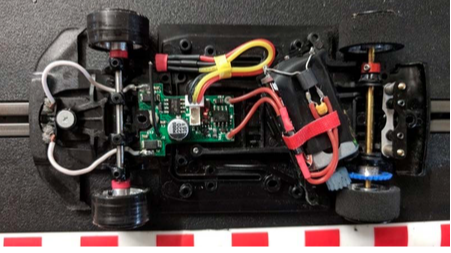
Instead of the stock motor pod (the kit comes with a Scaleauto anglewinder pod), I opted for a Slot.it AW pod with 0.0 offset. The pod was modified to allow me to use a Plafit pinion that has a larger diameter compared to Slot.it ones. Basically, I widened the U collar of the pod so that I can move the motor away from the rear axle to get a proper mesh with the gear. Here, I am using a 14 teeth pinion with a Slot.it 26 AW gear. Then using 2mm titanium screws, I fixed the motor to the pod to avoid any unwanted movement.
Conclusions
Being a big fan of this car, I am really pleased that Scaleauto has reproduced this model and provided a white-kit version of it. I have done some testing in the DiSCA GT3 configuration and the car is very competitive. Lap times on my home track are close to the Sideways Huracan in similar configuration.
The only improvements I can see are mainly aesthetic, but they are not that difficult to overcome by yourself. I hope that in the near feature, Scaleauto will issue other GT3 models to fill the current voids: 2018 Aston Martin Vantage, 2018 Bentley Continental, Ferrari 488, McLaren 650S, Nissan GT-R, and BMW M6 (although for this one, Sideways might be on the rescue).